Sunday, 26 August 2012

Egg white recipes | Thermomix

I have been finding with a lot of recipes I am needing to use the yolk from the egg only, and am then left with the egg whites. I have been freezing these, in a small container per egg white, then transferring them into a snap lock bag once they are frozen. Once they have defrosted, allow them to sit at room temperature for around half an hour to help them stiffen into peaks better when beating.

So what are some good uses for egg-white only?

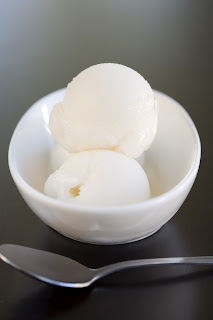
Well the most obvious one would be SORBET!!

Here are some others


from Thermomix-Recipes.com


Recipe from Super Kitchen Machine


What are your favourites?


Wednesday, 15 August 2012

Banoffee Pie Custard | Thermomix Recipe


Banoffee Pie Custard

Ingredients: 
500g milk
2 eggs
100g brown sugar
50g flour
40g butter
2 bananas, sliced

Add all ingredients (except banana), cook 90 degrees, 6 minutes speed 4. 
Add sliced banana*, cook 90 degrees, 1 minute, reverse 2.

If you want to avoid your banana pieces breaking up, stir them through during the last 30 seconds on speed 1. 


Monday, 13 August 2012

Making Yoghurt in your Thermomix


I recently went to one of our Thermomix branch meetings where Kirsty gave a talk about yoghurt making and shared her tips for getting perfect thick creamy yoghurt. You can find her blog and posts on that topic here. There has been a bit of discussion on my Facebook page about yoghurt making so I thought I should share that info here.

I use the yoghurt recipe from the Indian cookbook. There is also a popular coconut yoghurt recipe here on our Recipe Community.

Ingredients
1-1.5 litres full-cream or hi-lo milk (not skim milk)
2 to 3 Tbsp natural live yoghurt – this is your “starter” culture. Use the best quality one you can find. 


  • Heat milk 10 minutes/80°C/Speed 2. (Milk that reaches 80°C for 15 seconds is pasteurised.) Leave milk to cool until 37°C
  • Add yoghurt starter to the milk. Mix 5 seconds/Speed 3.
  • Heat 10 minutes/37°C/Speed 2. As soon as the yoghurt is finished, pour it into the pre-warmed  thermoserver, put the lid on and leave to set for 6 to 14 hours.
  • Once the yoghurt is set, it can be used immediately or refrigerated (remove from thermos first) for up to 5 days.


The most important things to remember are:

  • When you are cooling the yoghurt, wait until the 37 degree light goes OFF, as if you are watching the temperature drop and see the 50 degree light go off and the 37 degree light come on, that actually means the temperature is 49 degrees and this will kill your live cultures. So wait till the 37 light goes off and then you add your culture and warm it back up to 37 for 2 minutes. 
  • Pre-warm your thermoserver before you pour the yoghurt in. I put my oven on the lowest heat while I am heating my milk, with my thermoserver inside. Then when the milk is ready to rest after you have added the cultures and mixed/heated it again, pour it into your warmed thermoserver, then wrap the thermoserver in a nice warm towel/tea towel (an old baby blanket works perfectly!) and place into your cosy warm oven. Turn the oven off though...you just want a nice warm cosy environment, not too hot or you will kill the live cultures
You can let your yoghurt sit in here for 6-14 hours. It will thicken up a little more once you chill it in the fridge. You can also drain the whey from the yoghurt to thicken it up, by lining your varoma dish with some cheesecloth or a clean chux cloth, putting your yoghurt on top and sitting the varoma dish on top of your Thermoserver until the yoghurt has thickened up to your liking. Or let it drain overnight and the result will be yoghurt 'cheese'.

Keep the whey you drain away....that lovely, thick, golden liquid can be used in many ways. Have a read here at The Prairie Homestead for ideas on how to use whey.

I flavour my yoghurt with either a vanilla bean paste and honey mix, or with a teaspoon (per serving) of any home made jam or lemon butter. This way we can have a different flavour yoghurt each time we eat it, plus I know what is in the flavouring as I made it myself. It also means you have lots of plain natural yoghurt to use for cakes, dips, curry etc

Making your own yoghurt is one of the best money saving features of owning a Thermomix and if you go through a few litres of yoghurt a week you can save around $8/week just on yoghurt!

Don't be scared! Give it a go!! My first yoghurt batch was quite runny but still edible, but when I tried again with the above two tips I found it has been perfect every time.


Saturday, 11 August 2012

How often do you use your Thermomix?


I often get asked this question, and its not the first time I have posted about this...but today I thought back over the day and realised HOW MANY things I made and used my Thermomix for and it still amazes me.

Grated cheese
Made 1 litre of yoghurt
Weighed all my ingredients ready for my demo at lunchtime
Completed a full Thermomix demo menu:

  • sorbet
  • dip
  • bread
  • salad
  • risotto
  • custard

Chopped all my veggies for dinner, and cooked Beef Chow Mein
Weighed and cooked rice
Made 2 litres of almond milk
Made a chocolate energy drink from raw organic cacao with the almond milk
Made strawberry coulis for my yoghurt (which will be ready in the morning)

AND....I still have more energy...I may even knock out a chocolate custard when the kids go to bed!

Wednesday, 8 August 2012

Almond Milk and Almond Smooshy Stuff...nothing goes to waste with a Thermomix!

I recently went to a Raw Organic Chocolate making workshop, which I've mentioned on my Facebook page. One of the recipes we tested was making a highly potent raw chocolate energy drink, which is dairy and sugar free. It uses nut milk as the base along with other ingredients (if you would like the recipe just contact me and I can send it to you, its in our newsletter for August). So of course I stocked up on ingredients and made my own almond milk yesterday using this recipe from Farmer K's Kitchen.

Once you make your almond milk, which with a Thermomix takes all of 2 minutes and only 100g of almonds to make 1L of milk, you are left with what can only be described as almond 'smoosh'!! So not wanting to be wasteful and knowing the nutty goodness I had before me, I decided to wack this into some chocolate muffins and test it out. OH.....MY........GOODNESS!!!!!!!!! They were divine!

Here is my rough recipe for those of you playing at home (adapted from EDC)

Choc Chip Muffins with Almond Smoosh

150g self raising flour
150g almond smoosh
180g milk
150g raw sugar
2 eggs
50g olive oil
100g choc chips
2 TB cocoa powder

Put all ingredients in (except choc chips) and mix 20 seconds speed 4 (or until just combined).
Add choc chips and mix on reverse speed 4 for a few seconds until combined
Spoon into muffin papers and cook 180c for 20 mins or until cooked.

Voila!!

Thursday, 2 August 2012

Chicken, Bacon & Mushroom Risotto | Thermomix recipes


My sister once gave me a beautiful chicken, bacon and mushroom risotto recipe, passed to her from her boyfriend who was a chef. It has always been one of our favourites and one of the few meals I could cook really well and be delicious every time (prior to getting my Thermomix!).

So naturally, it was the first recipe I tried to 'convert' as a new Thermomix owner. Risotto was one of the main selling points for me when it came to considering a Thermomix...and when you can make it in 17 minutes with NO STIRRING then its pretty hard to walk away from!

Here it is for you to enjoy. Tweak it however you like but I think its pretty spesh! For those of you already on my mailing list, this is in our team newsletter for this month. If you would like to get on the list let me know, as we have some great tips and recipes each month.


Chicken, Bacon & Mushroom Risotto

Ingredients:

2 chicken breasts (or 3 thigh) diced 2cm cubes
150g diced bacon
6 button mushrooms
100g white wine
1100g water
2Tb veggie stock from EDC
50g olive oil
350-400g arborio rice
small onion
1 garlic clove
a few basil leaves chopped
50g parmesan (grate this first and keep aside to top risotto)

Method:

1.      Grate parmesan 10 sec speed 9 and set aside
2.      Chop onion and garlic 2-3 sec speed 6
3.      Scrape down sides, add oil, bacon, and cook for 2-3 minutes, reverse speed 1, 100c with MC off
4.      Insert butterfly, add rice & wine and cook 2 mins speed reverse + soft, 100c
5.      Add chicken pieces, 4 mins, speed reverse + soft, 100c and cook until white all over (will not be cooked all the way through but the stock will cook the rest)
6.      Add stock paste, mushrooms, basil, water (up to max capacity marker). Cook 20 mins**, reverse + soft, 100c until all stock absorbed and rice is to your liking (soft or al dente). Add any remaining water through top after around 15 minutes cooking time.
7.      Transfer to your Thermoserver and top with parmesan
Really nice accompanied with steamed vegies in winter or a salad in summer.

Recipe contributed by Natalie Sanderson