Showing posts with label dessert. Show all posts

Saturday, 18 January 2014

Frozen Yoghurt in your Thermomix


How easy is this? Freeze some yoghurt in ice cube trays, then blitz it up with your favourite frozen fruit, a dash of honey and an eggwhite or a splash of milk to bind it together and make it creamy. Whip it up with your butterfly until it looks like soft serve. So good!


Doesn't it look pretty?


Make sure you try it


Thursday, 9 January 2014

Snow cones in your Thermomix


Perth is getting HOT HOT HOT!! Snow cones for the kids!! Anyone wanna join me? If you don't know how already...and you have a Thermomix (and if you are here and you don't...you might need to get in touch with a consultant!) then read on...

{ Snow Cones }

2 trays of ice
50g syrup/coulis/topping

Add to TM bowl, speed 8 for 10 seconds, scrape down and repeat for 5-10 seconds
Add 50g of syrup/coulis/topping flavour of your choice
Speed 8 for 5-10 seconds


Scoop into cute little cups and enjoy! You can even shape it into cones if you are feeling extra fancy!

See more on my FB page

Tuesday, 30 April 2013

An easy dessert the kids can make in the Thermomix


Dessert made for us by our 5 and 3 yr old daughters....Pears with Chocolate Hearts. Impressed!

Recipe from Full Steam Ahead

Sunday, 28 April 2013

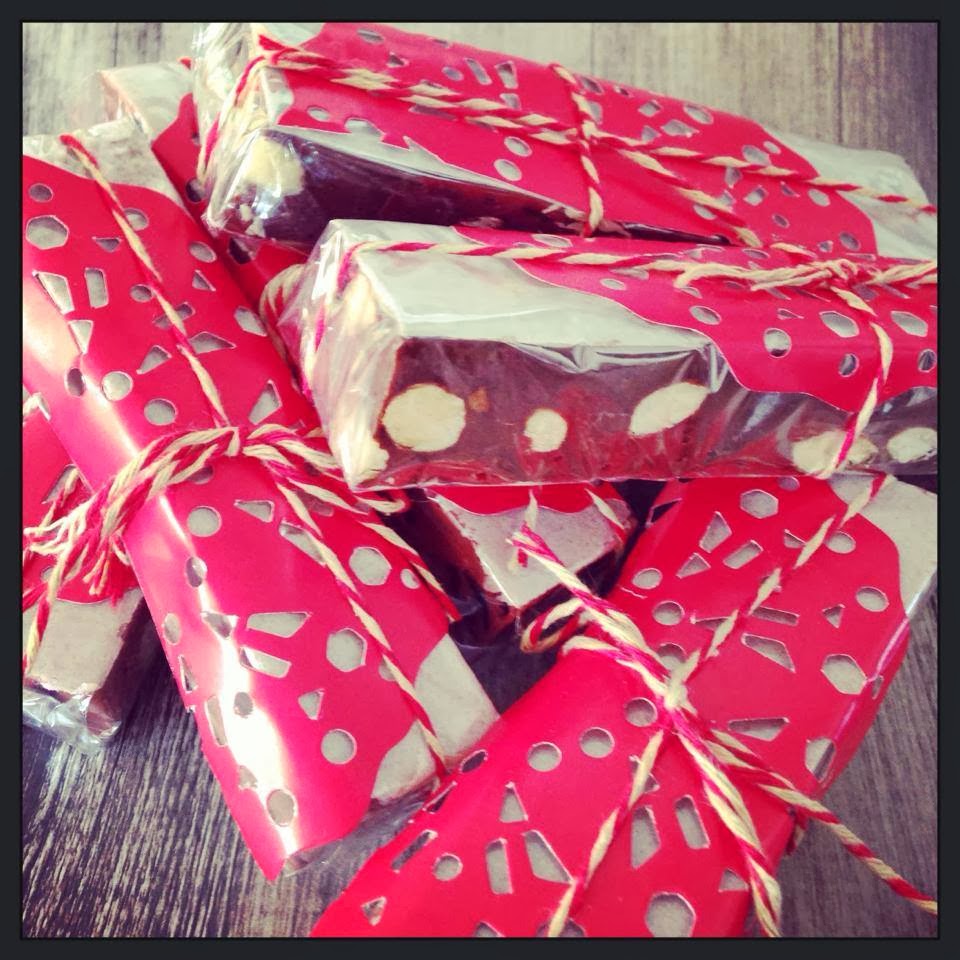
Choco-latte Nougat with Roasted Almonds | Thermomix nougat!


I've tried a few different Nougat recipes and techniques in the Thermomix, but I think this is the best! 


Credit for the basic nougat recipe goes to my awesome Thermomix Group Leader, Trisha, who developed the Nougat recipe on Recipe Community. I've changed the ingredients a little to come up with the Choco-latte version. You could do the same...what flavours could you come up with?

Ingredients
200g dark chocolate
200g white marshmallows
100g roast almonds (or roast raw almonds yourself under a hot grill for 5 mins)
20g butter
15g good quality instant coffee granules 
1 piece of (confectionery) rice paper (I get mine from Weigh n Pay in Woodvale WA)

Preparation
* note: this is a technique you need to be ready for so make sure you will have no interruptions as you can't leave the mixture or it will set in your bowl. Your TM will also wobble around a bit while it is mixing (similar to kneading dough) so don't walk away and leave it 

  • Have a small rectangular dish approx 20cm x 10cm ready, double lined with cling wrap (this will make it easy to remove once set) and line the bottom with a rice paper sheet 
  • Put chocolate, coffee, marshmallows and butter into TM bowl and chop on speed 6 for 10 seconds
  • Scrape mixture down 
  • Heat on 80c for 5 minutes, speed 2-3 (you may need to use the spatula to keep the mixture moving as it gets extremely sticky and tough and can start to slow the blades down if you aren't careful)
  • Take lid off and scrape mixture away from blades to make a little space around it, this helps the mixture move around without turning into a big lump, then cook for a further 6 minutes, 70C, speed 4 (using the spatula to keep the mixture moving if it sounds like it is slowing down)
  • Add nuts, mix for 10 seconds, reverse speed 2 or until combined. Alternatively you can place your nuts in the bottom of your dish, and pour the nougat mixture on top.
  • For the next stage you need to move QUICKLY!  Pre-boil a full kettle of water to clean jugWipe over your TM spatula with oil, to stop the mixture sticking as you work with it. Scrape and pour the nougat mixture into your pre-prepared dish. You may need to have a butter knife handy to help you scrape the mixture off the spatula as you go, as it is extremely sticky and stretchy as you are working with it. 
  • Once it is all out press the other piece of rice paper onto the top and smooth flat and push into the corners of your dish and put in the fridge to set for a few hours (or in the freezer if you can't wait)
  • Fill TM bowl with boiling water asap as any mixture left will set hard and sticky
  • Once set, trim off the edges to neaten it up (and make sure it tastes awesome)


Cut into squares or long bars once set, and try not to eat the whole lot at once!


Wednesday, 10 April 2013

Snicker-licious Layered Cheesecake (non bake) | Thermomix Recipes


© Nat's Thermomixen in the Kitchen (This is my personal recipe. I am happy for you to use it, print it, pin it, share it...but please give credit and link to my page. Many thanks! Hope you like it)

Total time: 20mPreparation time: 20m

Ingredients

Base
80 g butter 
250 g Chocolate Biscuits (I used chocolate ripple)

Layered Cheesecake topping
500 g cream cheese 
400 g tin condensed milk 
2 tsp Gelatine powder 
50 g boiling water (1/2 MC)
2 Snickers chocolate bars
50 g cream (1/2 MC)
2 tbsp good quality cocoa powder 
100 g Peanut Butter 
2 tbsp peanuts for decoration 

Preparation

Base
Snap biscuits in half and add to bowl with butter and mix for 10 seconds speed 6 or until biscuit comes together.
Press biscuit mix into a greased and lined springform cheesecake tin and allow to firm up in fridge.  No need to bake

Cheesecake topping

Mix gelatine powder with 1/2 MC of boiling water in your MC with a spoon until dissolved, then set aside and allow to cool.
Break Snickers bars into small pieces and chop for 3 seconds speed 6.  
Add cream and melt for 5 minutes speed 2 and 50C.  Set aside.  (If you have a second bowl set use it to make the cheesecake mixture while you put  your bowl used for chocolate aside.  Otherwise set aside your chocolate mixture, clean your bowl and move on)
Add cream cheese and condensed milk and mix 15 seconds speed 6. 
Add cooled gelatine liquid to cheescake mixture in bowl and mix speed 4 for 4 seconds
Tip approx 2/3 of cheesecake mixture into another bowl, leaving 1/3 in your TM bowl.
Add cocoa powder to remaining mixture in your TM bowl and mix for 10 seconds on speed 4.
Pour chocolate cheesecake mixture onto biscuit base smoothing out nice and flat
Pour remaining cheesecake mixture back into TM bowl and add the snickers ganache mixture back in along with the 100g of peanut butter.
Mix together for 10 seconds speed 4 or until nicely combined. 
Pour remaining cheesecake mixture on top and smooth and flatten out the top
Decorate top of cheesecake mixture with peanuts, or as desired.  Allow to set in fridge before serving (1-2 hrs minimum)

Tip
You can bake the biscuit base before adding the cheesecake mixture if you prefer a firmer cheesecake base, for 10 mins on 180c.

Utensils
Use your MC to mix the 2 ts of gelatine powder with 1/2 MC of boiling water until dissolved and allow to cool. This gets added in with the cheesecake mixture to allow it to set.

Friday, 28 September 2012

Red Velvet Cheesecake Brownies | Thermomix Recipes


Ingredients

Base
120g unsalted butter, diced
60g dark chocolate buttons
200g castor sugar (pre-made with your Thermomix)
2 large eggs
1 ts vanilla extract
1 ½ ts red food colouring
100g plain flour
¼ ts salt
Cheesecake topping
250g cream cheese
70g pre made castor sugar
1 large egg
½ ts vanilla extract

Method

Base
Preheat oven to 170-180°c. Prepare a lamington tin with baking paper in the base and extending up the sides (this will make it easier to lift out the brownie when it cools)
Mix dark chocolate buttons and butter, 50°, speed 1, 5 minutes until melted and smooth
Add 200g sugar, vanilla, colour and eggs. Mix for 5 seconds, speed 4.
Add flour and salt. Mix for 5 seconds, speed 4 until flour is just incorporated.
Pour into prepared lamington tin and spread across base (then lick spatula, hiding in pantry to do so if you have small children watching who may want to share)

Cheesecake topping
Mix cream cheese, remaining sugar, egg and vanilla 1 minute speed 4
Spoon mixture onto top of base in 6 or so big dollops. Swirl cheesecake topping across the base with a knife or your spatula tip
Cook for 30 minutes or until cheesecake topping is set. Allow to cool in tin completely before removing

Friday, 21 September 2012

Sticky Pear Ginger Cake | Thermomix Recipes


This has been one of my family favourite recipes for years, so I adapted it to simplify it for the Thermomix. It tastes amazing warm or at room temperature, and tastes great with a dollop of sour cream or natural yoghurt (made in the Thermomix of course!)

Ingredients

140g golden syrup
100g dark brown sugar
125g butter, diced
250g self raising flour
1 ts bi-carb soda
1 Tb ground ginger
310g milk
1 large egg
2 pears - peeled, cored and diced

Preparation

Cook butter, golden syrup and sugar on 90c, 5 minutues, speed 2
Add dry ingredients, milk & egg, mix speed 4, for 4-5 seconds (until dry flour is just combined, don't be tempted to over mix as this will keep it light and fluffy)
Add pear pieces, mix reverse speed 2, 3 seconds

Line a square cake tin with baking paper, add mixture and bake 180c for 60 mins or until cooked (test with a wooden skewer, it is ready when it comes out clean)
Cool in tin for 10 minutes, then cool on a wire rack until cold

Always tastes better the next day!!

For a richer flavour, use 70g golden syrup and 70g of treacle.

This is my recipe, if you would like to share it please give credit and link back to my blog or facebook page